Automatically Change Attender Status
Today we’re going to learn how to automate the action of changing somebody from active to inactive. We’ll also look at how you can show ministry leaders how to use it for their purposes.
What is Non-Attender?
Before we build the system, we need a clear vision.
People are welcome regardless of the label in their Planning Center profile. In reality, attender vs. non-attender doesn’t mean anything. What we’re actually measuring is engaged vs. unengaged and even that is hard to measure well.
As we know, when people serve, they build community and community is a cornerstone of our Christian faith. Oh, and by the way, a study we did for the other church app I built found that the value of a single volunteer is up to $16,800 annually! (WATCH THIS VIDEO)
So why would we mark somebody as a non-attender? You likely have your own reasons but here are a few that come to mind:
- We don’t want to contact them with certain information if they no longer attend.
- We want a semi-accurate count of who is actually engaged
- Our PCO list results are more manageable
- We don’t waste employee or volunteer time contacting people who are no longer a part of our church.
Churches get hung up on active vs. inactive.
In reality, meticulously trying to keep this status updated is tedious and time consuming and likely not worth the effort. What we’re talking about here is how we do it without it taking a lot of our time.
Let’s Redefine
What if we took the weight off our data people and said, “if we have no record of a person doing anything in the past X months, they are a non-attender?” That doesn’t mean they aren’t attending. (although the name indicates that). It simply means they haven’t engaged in a way that we call engagement.
Also, if we hear that a person no longer attends, we will mark them as inactive but other than that, we’ll let PCO do the work and focus our efforts on the people that are engaging versus try to define the people that aren’t.
The List
At our church, engaged means that they’ve done one of the following:
- Checked somebody in
- Attended an event
- Joined a group
- Served somewhere
- Gave
- Engaged with the church center app
You define it however you would like, of course.
OK, here we go…the list. Your Rule #1 should look like this:
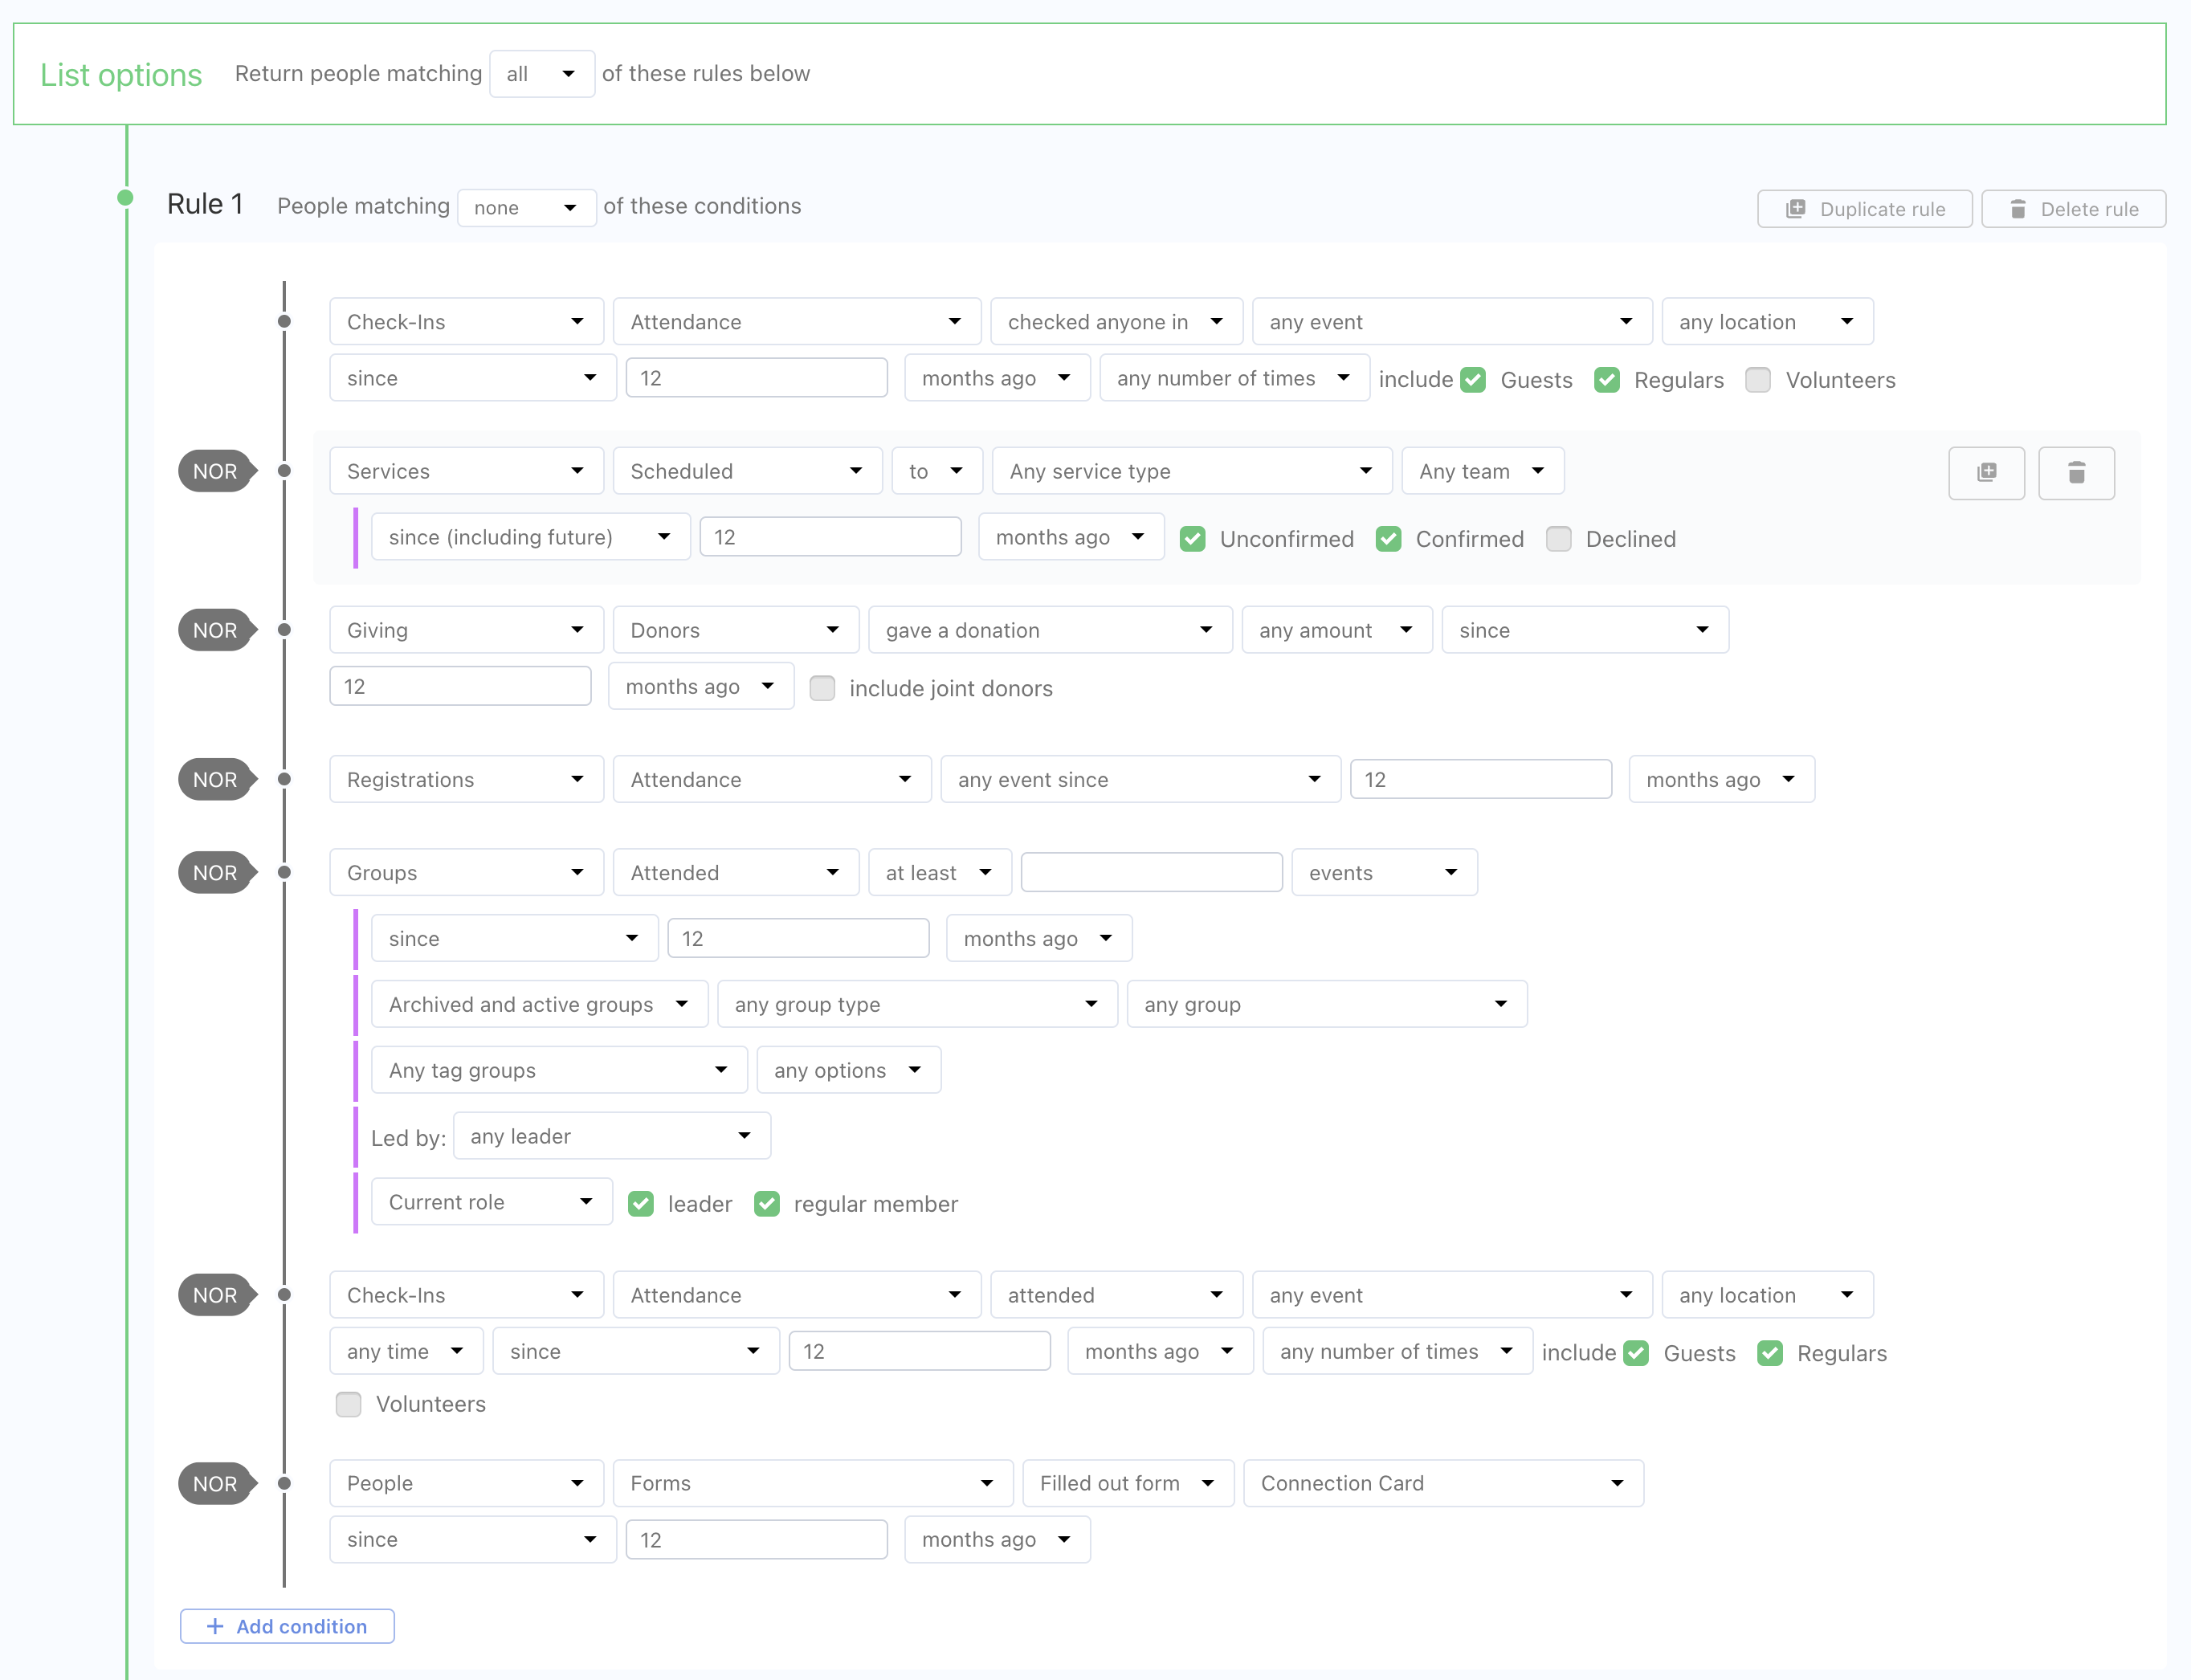
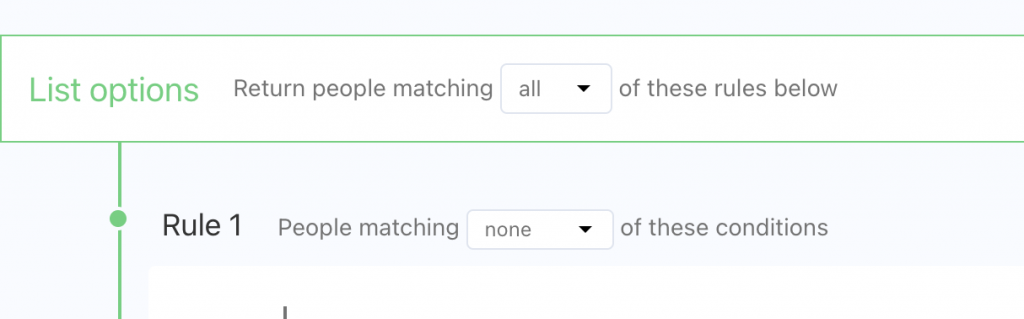
Make sure you change the drop downs at the top to look like this:
Breaking Down the List
Remember each of those 6 conditions that I said define a person as engaged? Each of the “NORs” on the list address a condition. The good news is that for most of these, when you add them, there’s not much to change. Just make sure you change the timeframe. We define “engaged” as 1 year so everything on my list is “since 12 months.” The only exception is the Church Center app, which is 90 days because that’s the maximum offered.
Notice that there are 2 checkin conditions. One captures people who checked themselves in and the other captures people that checked somebody else in.
I also have a rule in here for people who have completed our online connection card. I added this after a bunch of thought. Honestly, I could make arguments both ways of whether that counts as “active”, but I added it just to show you how to add forms as conditions. In reality, I think I’ll take it out before we run it for our church.
Rule #2
The second rule in the list will find anybody that has a status we want to change. In this case, we want all Active people on the list.

Then we run the list.
In order to add a PCO module to your list, you must have permission to view it. If you don’t, it won’t appear as an option.
Next, always VALIDATE your lists. Once PCO displays the results, check at least 15-20 entries to make sure they match what you wanted to see. I validated…still wrong…tweaked again…validated…still wrong…validated again….nailed it. The more complicated the list, the more you’ll have to validate.
Next we need to make a few changes to the list settings. Click the “Settings” tab on the list and make these changes:
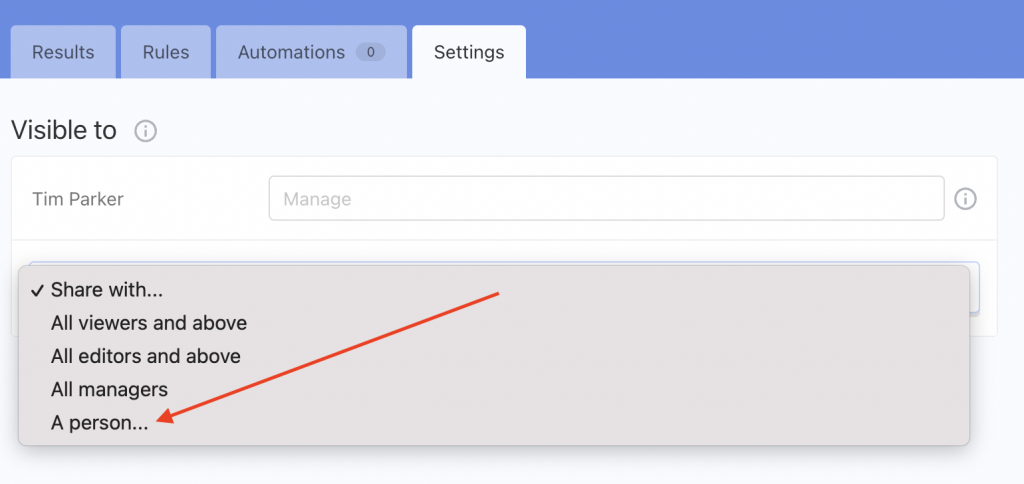
You can share with a person or any of the groups you see in the dropdown. Always have at least one other person able to access a list.
Don’t forget to turn on Auto-refresh. If you don’t, your list won’t update unless you do it manually.
Add the Automation
Next, we want to tell PCO to automatically change their status to “Non-Attendee.” (or whatever status you would like.) Remember, this list is showing us people currently marked as Attendee but are actually non-attendees based on their (lack of) activity. We do that with an automation.
Click the Automation tab on the list and add this:
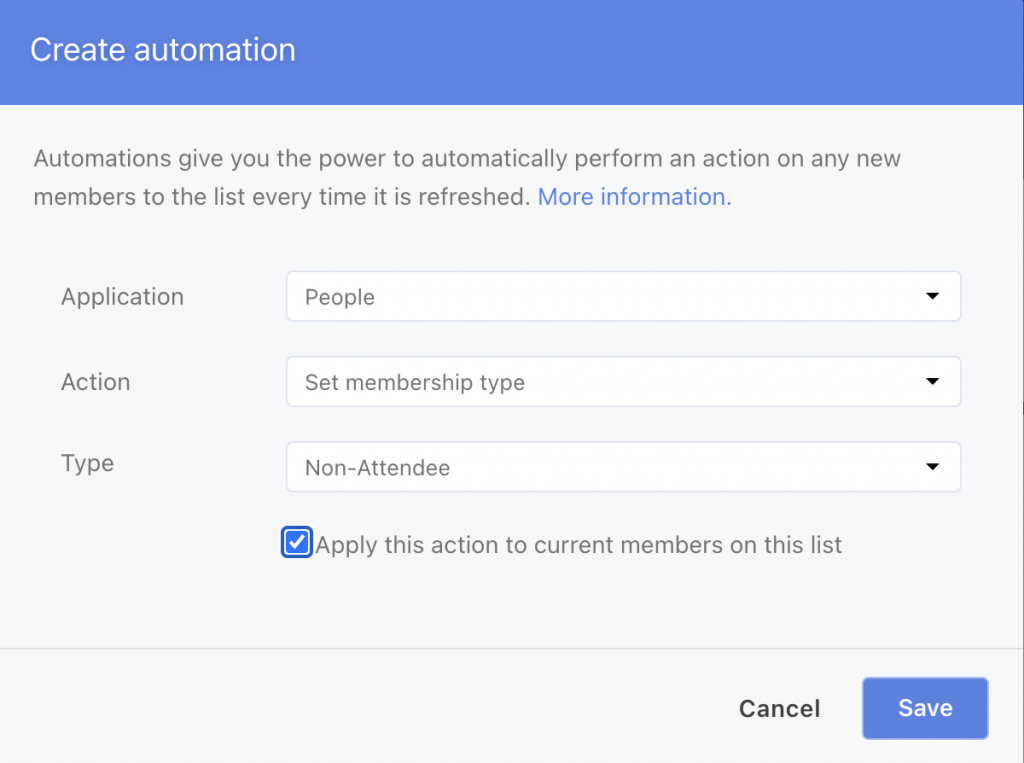
DONE! We have marked them as non-attendee. If your head hurts a little bit, I understand. This is some complicated stuff but we now have an automated way to make our labels more accurate based on activity.
Next: You might want to look for non-attendees who have any activity in the past 12 months and change their label to attendee. All you do is reverse the list conditions.
Wrap Up
Even if you don’t think you’ll use this list, one of the reasons I put this together was so you could see how to capture a person’s activity and run lists and automations off of that information. As you can see, it’s not easy and straightforward to find all user activity but once you figure it out, you open up a whole lot of new list possibilities.
P.S.
I ran into a few issues putting this list together. Thanks to PCO Support for helping me get over a few hurtles. I’m sure you agree with me when I say that PCO support is some of the best support of any app I use.