How to Clean PCO Services Permissions
If somebody hasn’t served in a while, their advanced privileges in Planning Center should be removed. I don’t think anybody would disagree with that but who has time to keep up with those people? Today, I want to show you a simple way to be alerted to people that should have lowered permissions automatically.
PCO & Security
We’re going to look at PCO Services for this article but you can do it with other PCO modules as well. You likely have volunteers who help to create services, schedule people, and upload songs and media.
Rule #1- DO NOT give out Administrator access. Very few people need Administrator access. Give them only what they need to complete the work you asked them to do. If all they do is schedule, give them Scheduler access. If they do other advanced tasks, give them Editor access. For tasks that require Administrator rights, try your best to keep that within staff members.
In the IT world, we call this, “Least Privilege.” It helps to keep personal information safe and protects against inadvertent changes that could do grave damage to your Services structure.
Finding the Inactives
Let’s put a number on what is considered “Inactive.” If they haven’t served for _____ number of months, we move their privileges back down to Scheduled Viewers. At my church, we use 6 months. My advice is to make it smaller than you think it should be. It’s easy to change permissions when they come back.
Step #1- Make the List
The first thing we’ll create is a PCO list. Go to PCO People, click the Lists menu item at the top and select, “New List” in the upper right corner.
Click on the Rules tab and create these rules:
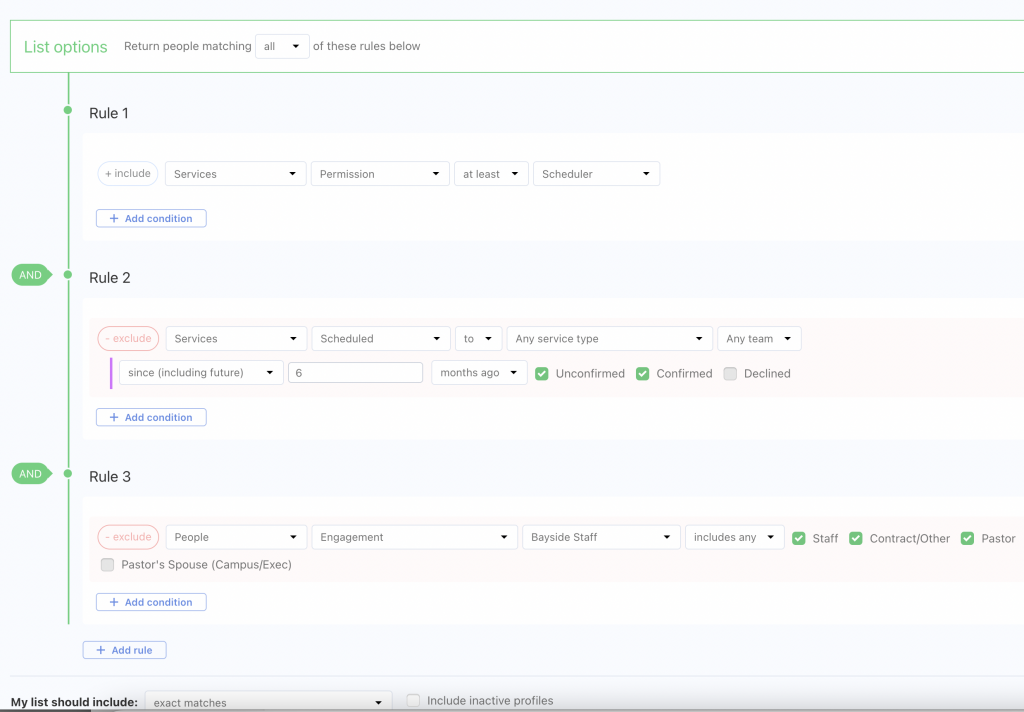
NOTE: I left rule #3 in place so you could see how you can further refine the list. In this case, I don’t want current staff members on my list.
Next, we need to make a few changes to the list settings. Click the “Settings” tab on the list and make these changes:
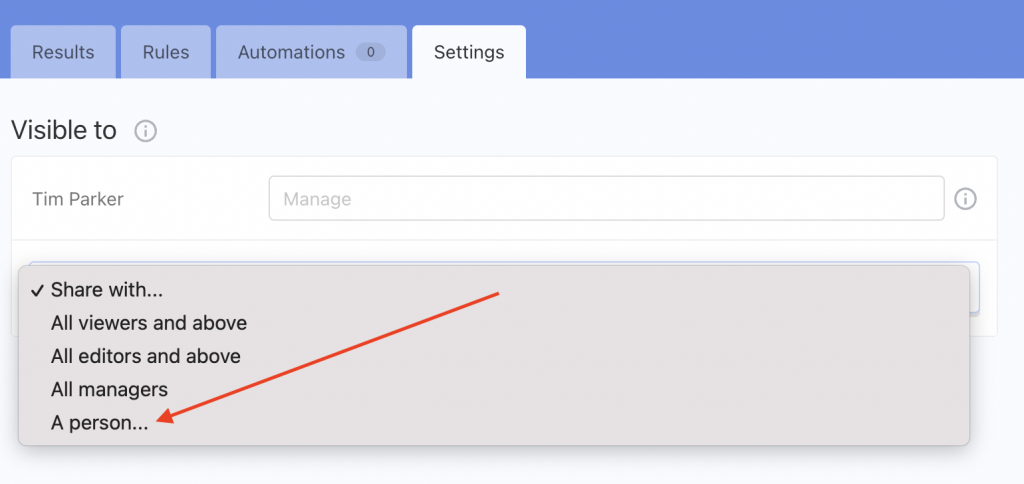
You can share with a person or any of the groups you see in the dropdown. Always have at least one other person able to access a list.

Step #2: Create the Workflow
The list gives us the information we need but the list isn’t going to alert us when we need to take action. That’s where the workflow comes in.
Go to PCO People, click on “Workflow” at the top, and click “New Workflow” at the upper right corner.
Next, name the workflow whatever you would like but something like, “Downgrade PCO Services Permissions” would be a good name. You can assign a category but if you’re new to workflows, you likely don’t have many workflows so keeping them organized can come later.
Next, we have to make the workflow. Click, “Add a Step” and make a step that looks like this:
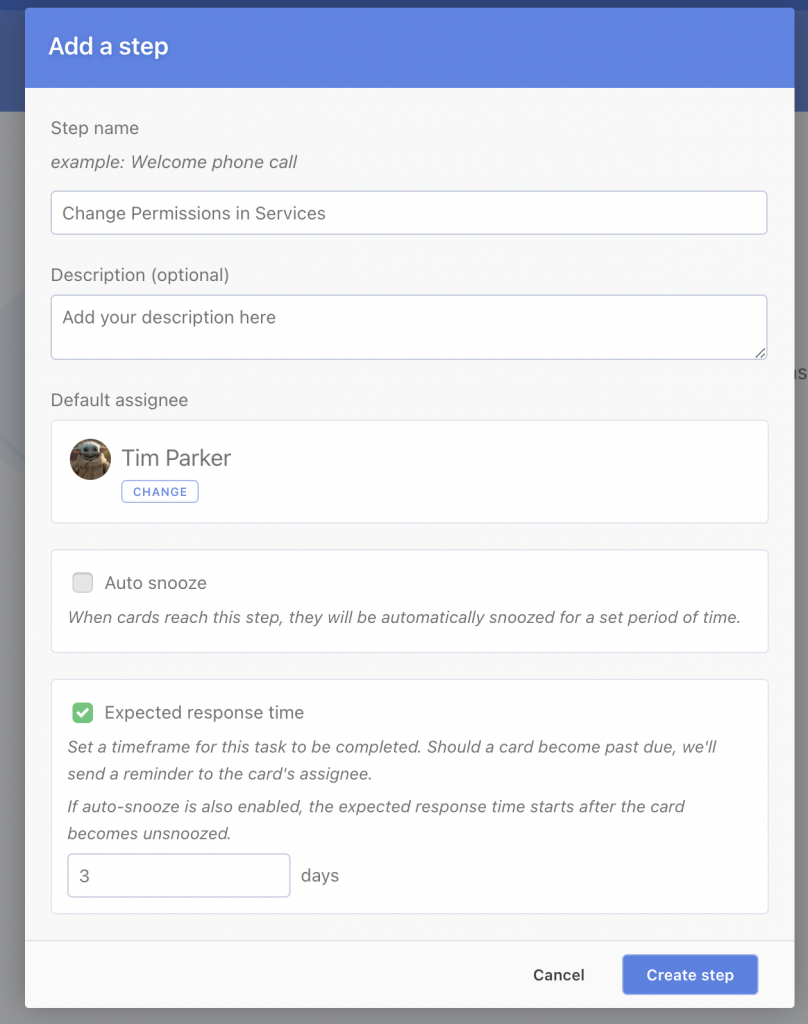
If there is anybody else you would like to have access to this workflow, you can add them. Check this out:
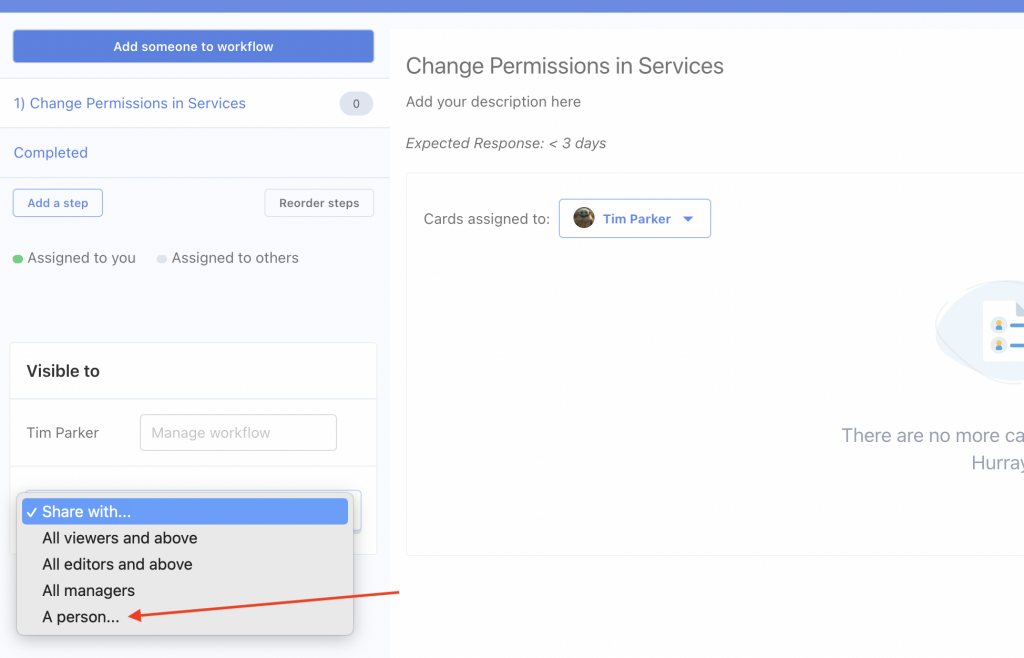
That’s about all we need in our workflow. Now, we have to go back to the list we created earlier.
Step #3- The Automation
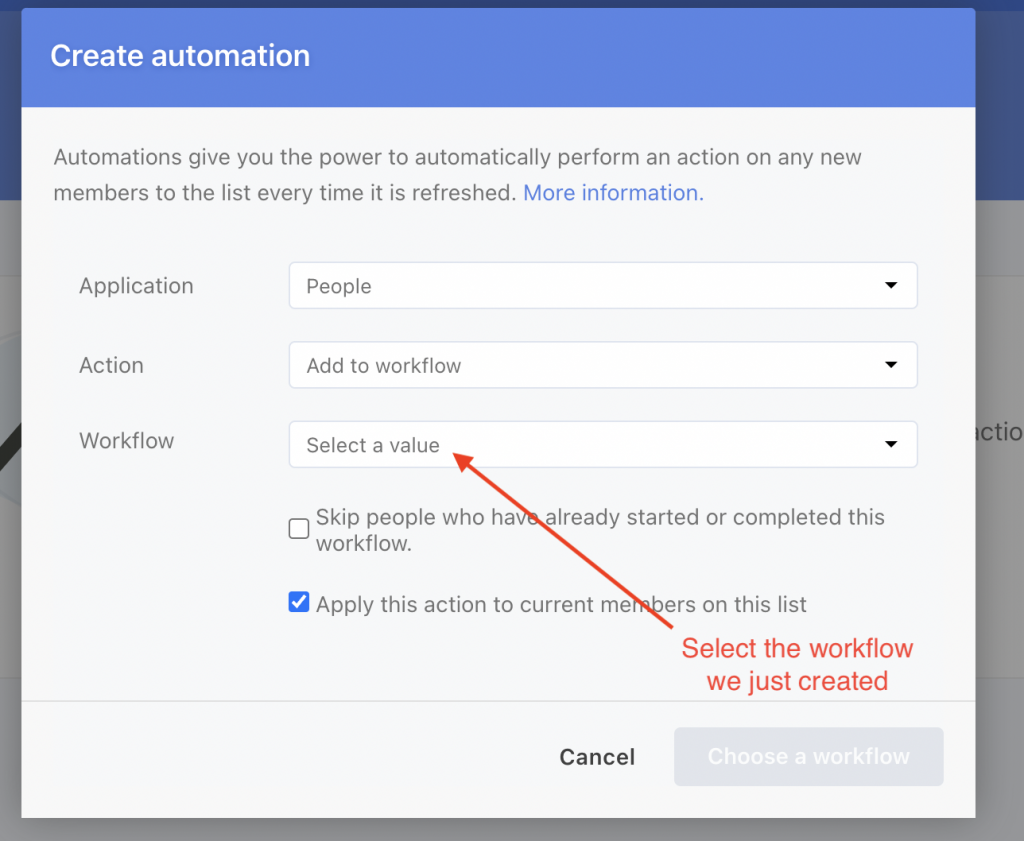
Finally, we need to connect the list we made to the workflow. Without forgetting the name of the workflow we just created, let’s go back and open our list. We’re going to click on the Automations tab. Click “Create automation” and create the automation below.
The Result
When you created the list, it found everybody who had Scheduler permissions and above who have not been scheduled in the past 6 months. Each morning at 2:00am, PCO will rerun the list. PCO then creates a workflow card for each person on the list and will send you an e-mail telling you that a card was created.
When you receive that e-mail, go into the workflow, open each card, and examine that person’s profile. Of course, a computer doesn’t know of any backstory connected to that person so use your personal discernment when making decisions.
That’s it. You now have a powerful way to clean PCO Services and better protect the personal information of everybody in your database.
A quick aside: Workflows are SUPER powerful. If you’ve never used this feature, take some time to learn about how to use them to your advantage. Maybe we’ll cover that in later posts.
Let me know how this works for you. Click the Contact button above.